Breach the Bastion Spire Deck Builder Controls & UI Guide
Find Menu → Codes, read combat intents, and navigate map nodes without missing rewards.
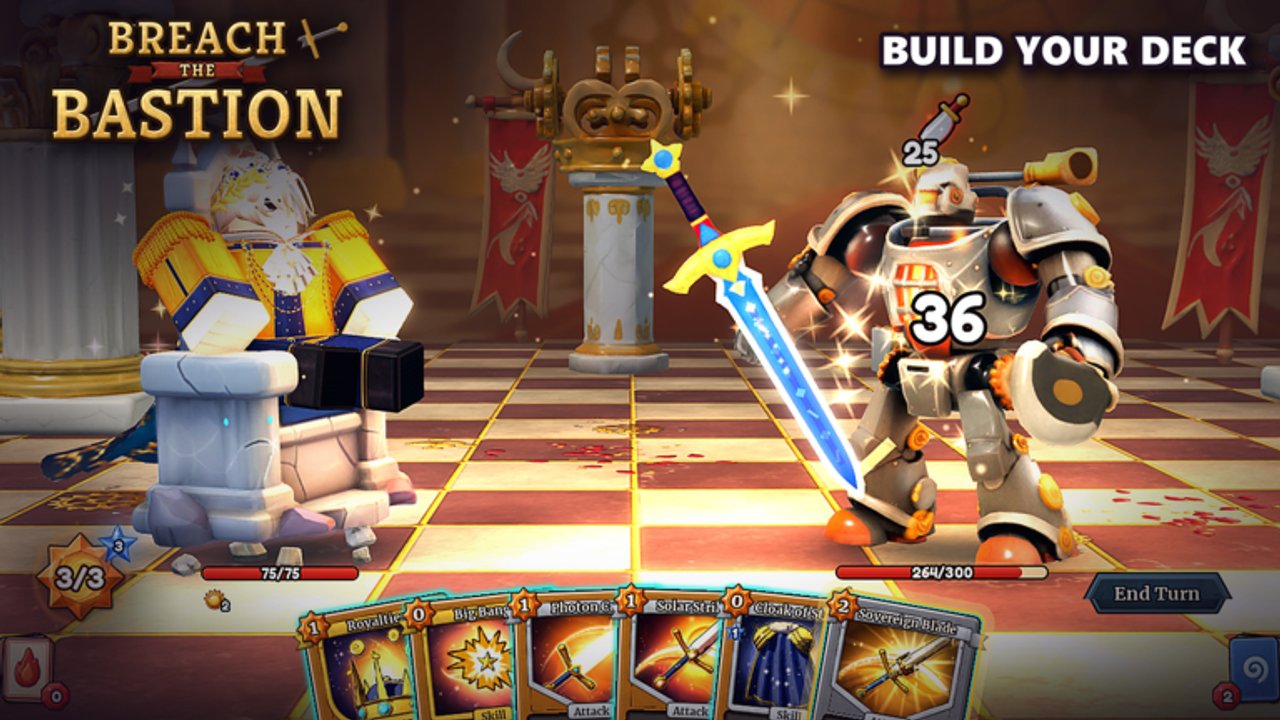
New Breach the Bastion players often search for controls because the Roblox HUD hides important tabs behind a single Menu button. This guide maps the UI surfaces you actually need: redeeming codes, reading combat, picking map nodes, and leaving a run cleanly. Button art can shift with patches—always trust live labels over outdated screenshots.
Pair this page with How to Play for the combat ruleset and How to Redeem Codes for a codes-only walkthrough.
Launch and lobby basics
- Open the official experience: Breach the Bastion: Spire Deck Builder.
- Wait for the place to load fully before hunting for buttons—slow networks can hide HUD icons for a few seconds.
- Confirm you are on the Cheesy Games Studios OriginalsTM place (place id
96414749635381), not a similarly named fan copy. - Choose solo or invite up to three friends for a four-player party before you commit to a climb (Co-op Guide).
Roblox touch and mouse/keyboard both work. Exact keybinds for camera or Roblox emotes follow your Roblox client settings; the game’s strategic clicks happen on its own HUD widgets.
Menu icon and Codes tab
Promo codes are redeemed inside the experience, not on the Roblox website gift page. Community guides (including Destructoid’s November 2026 codes article) document this flow:
- Look for the Menu icon along the bottom of the screen.
- Open Menu and switch to the Codes tab.
- Paste a string such as 1KCCU into the text field (copy from the Codes Hub—do not retype from memory).
- Press Redeem and watch for a reward toast or inventory change.
If the Codes tab is missing, you may still be on the loading overlay, in a cutscene, or on an outdated client—rejoin after updating Roblox. Full troubleshooting lives on How to Redeem Codes.
Combat HUD — what to read every turn
Breach the Bastion follows a Spire-like turn loop: play cards, spend energy, gain block, end turn. While exact widget names can hotfix, train yourself to scan in this order:
| Scan order | What to check | Why |
|---|---|---|
| 1 | Enemy intents / telegraphs | Decide whether to block or go lethal |
| 2 | Your energy | Avoid ending the turn with wasted resources |
| 3 | Block and HP | Survive multi-hit elites |
| 4 | Hand cards | Play setup before payoff (Brewer brew → burst) |
| 5 | Potions | Save for elites/bosses unless you die now |
Hover or long-press enemy icons when the client allows tooltips. Unknown status names should be learned in-run—do not memorize third-party spreadsheets as gospel. Deeper tactics: Beat Elites and Brewer Class.
Map and path UI
Between fights you pick nodes on the fortress map: hallway combats, elites, rests, shops, events, and boss gates. Practical UI habits:
- Zoom or pan only as far as you need to compare two candidate paths—decision paralysis wastes co-op time.
- Prefer rests before elites until your block package is online (Path Planning).
- Open shops with a shopping list: removals and key relics beat random card packs for beginners (Getting Started).
- In co-op, wait for a path vote before clicking a node that locks the party.
Map Ink rewards from codes sit in your progression/cosmetics layer—claim them before a long session via Menu → Codes, then plan routes with a clear head (Map Ink Guide).
Reward, relic, and merchant screens
After combat, reward panels offer cards or sometimes relics. Merchant screens sell cards, removals, and relics for gold. Controls tips:
- Read the full card text before tapping Take / Skip.
- Skipping is a valid control input—not a bug.
- On merchants, prioritize remove when your deck is clogged (Deck Building).
- If an auto script ever hijacks reward clicks, kill the executor and finish the run manually (Scripts).
Class select and Brewer kit UI
When the November 2026 Brewer class is unlocked, class select shows the new kit alongside launch heroes. Inside a Brewer run, watch for cauldron / reagent UI (Amber, Shell, Spore) and brew prompts—the first brew each combat granting energy is a timing cue, not a free click to spam. Details: Brewer Arrives Update.
Mobile vs desktop notes
- Mobile: larger tap targets help; be careful not to mis-tap End Turn near the edge of the hand.
- Desktop: mouse hover makes intent reading easier; keep the Codes tab bookmarked mentally so you can redeem mid-lobby.
- Performance: close other Roblox experiences if the HUD stutters during four-player co-op.
Quick control checklist before a serious run
- Client updated; correct place id.
- Codes redeemed (1KCCU while active).
- Party size agreed (solo or up to four).
- Intent to scan intents every turn.
- Path bias chosen (safe / balanced / elites).
- Potion policy spoken in chat if co-op.
Use the Run Checklist as a printable mental list, then return here whenever a friend asks “where is the codes button?”
Related pages
Master the Menu first, then the combat scan order. Clean UI habits win more Bastion climbs than memorizing every rare card name on day one.
Frequently Asked Questions
Quick answers to the most common questions.
Where is the Codes button in Breach the Bastion?
Open the Menu icon at the bottom of the screen, then open the Codes tab. Paste the code and press Redeem. Codes are not redeemed on the Roblox website.
What should I look at first each combat turn?
Read enemy intents, then your energy and block, then decide which cards to play. Save potions for elites unless a hallway hit is lethal.
Can I play with a controller or only mouse?
Use whatever input Roblox supports on your device. Strategic actions happen through the game HUD—Menu, cards, map nodes, and merchants.
Why can’t I see the Menu?
Wait for the place to finish loading, update Roblox, and rejoin the official place. Overlays and cutscenes can hide HUD icons briefly.
Where do I learn map pathing clicks?
See the Path Planning guide for safe vs elite bias, and Getting Started for beginner rest-before-elite habits.